
COW_TRIX
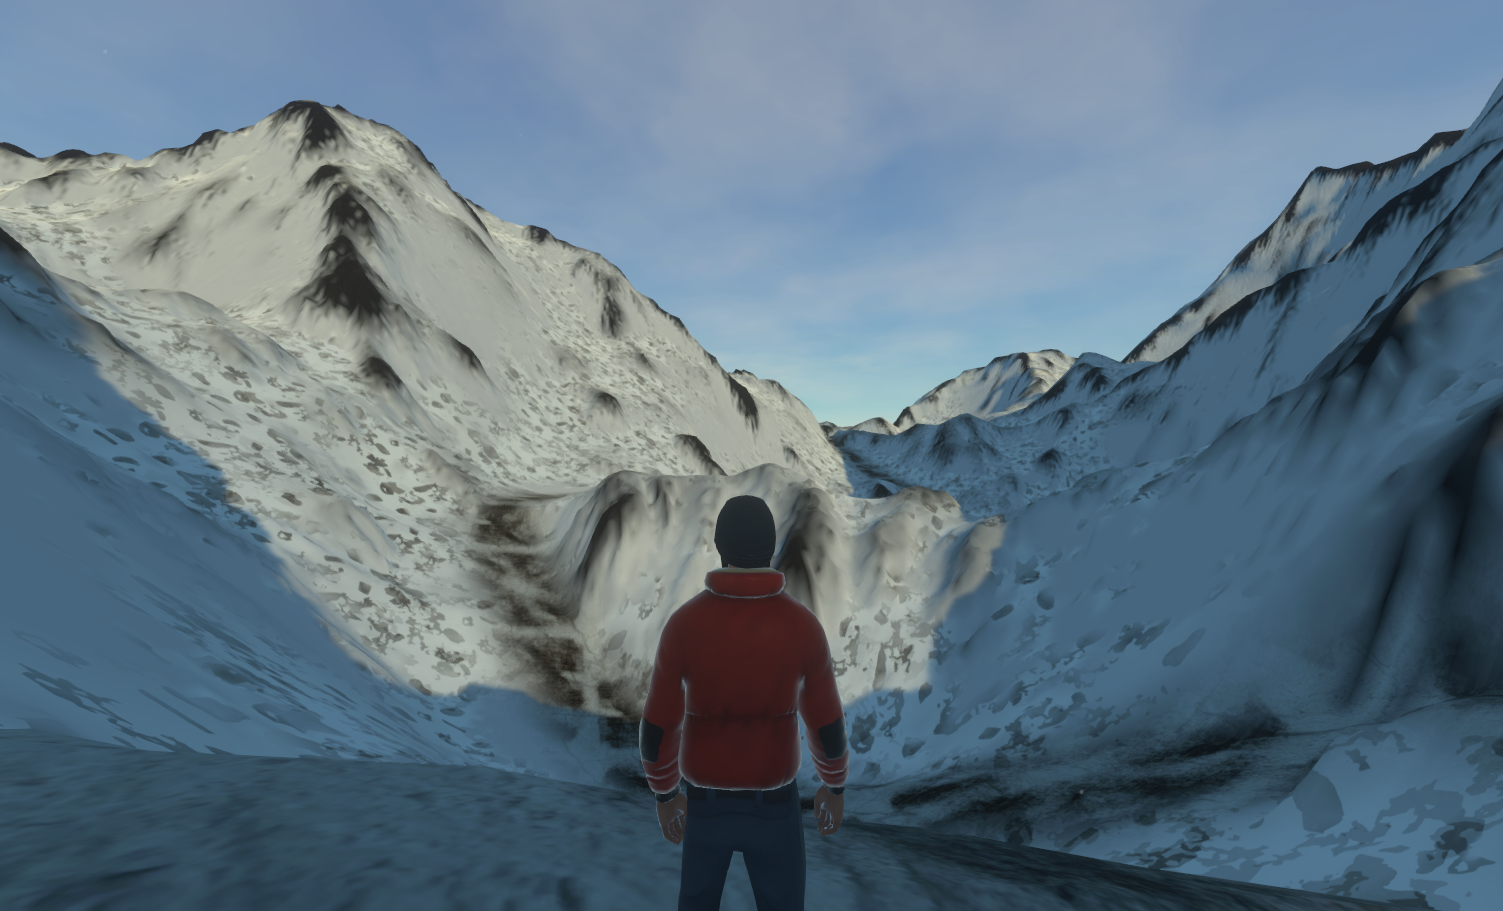
This week my SDK work has extended into reworking the biome, weather and skybox system (it’s really sort of one system, so the reworking encompasses all of it). I also kept fiddling with and making some biomes. Check out this WIP mountainous biome!
This refactor will enable users to specify custom biomes, weather systems and biome-influenced client effects in the SDK, something that was previously impossible.
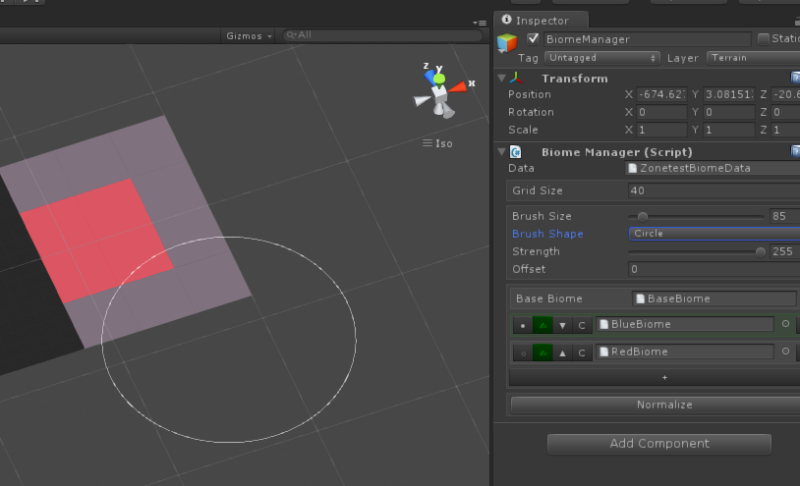
The first thing that needed doing was rethinking the usability of the biome tools we have in place. While the ShigiTools biome tool was usable, it wasn’t super user friendly. While that will still be an option, we now have a MapMagic output that will work as well, and a biome painting tool in the editor.
Biomes have changed a bit in how they work. They are no longer concrete enumerations that are linked to a script that builds how they work. Now, their configuration is entirely serialized and configurable, everything from the color of the sun to the temperature to if you want it to blast a gazillion units of radiation every day at noon for an hour. A map will now have a ‘base biome’, which acts as a fallback for when there is no mapping for the cell a player is in.
We also upgraded Time of Day, the skybox plugin that we use for skybox rendering. There are some pretty nice features in it, like a cool atmospheric scattering effect, which might make the world look a bit prettier with minimal effort. Also, the latest Time of Day implements natively animated parameters. This means things like if you want the color of the sun to change throughout the day, this is now much more viable. Previously we had to implement this ourselves with this whole layer of abstraction, and now we don’t need to, which makes the whole system way cleaner and better. However, it did lead to an interesting performance issue.
One of the requirements for a skybox is interpolation. A cell can contain an arbitrary amount of biomes at different strengths. You need to interpolate, or tween, between the configurations. This was easy to do in the previous version of Time of Day, because all the configuration was structs or value types so we could do quick lerps without allocation. However, Time of Day implements animated colors via the UnityEngine’s Gradient class, which contains two arrays of the color keys and alpha keys, meaning it’s allocation city. I experimented with pooling these gradients, but it was kind of a rabbit hole. Just getting the alpha and color keys of a UnityEngine.Gradient allocates memory. So I took the interpolation back to the drawing board.
What I really needed, I thought, was the ability to apply a weighted normalized stack of skybox configurations to a weight. A weighted normalized stack in this context is just a mapping of biome to weight, which is a number between one and zero, where all the weights combined add up to 1. While before I was crunching this stack down into a final object – meaning I had to lerp UnityEngine.Gradients, meaning allocation – if I instead just stored the necessary information of the stack and processed it as I went, then I didn’t really need to store the result of the stack anywhere. This works great! We can interpolate between arbitrary amounts of biomes, it’s fast, and we’ve reduced memory allocations to zero.
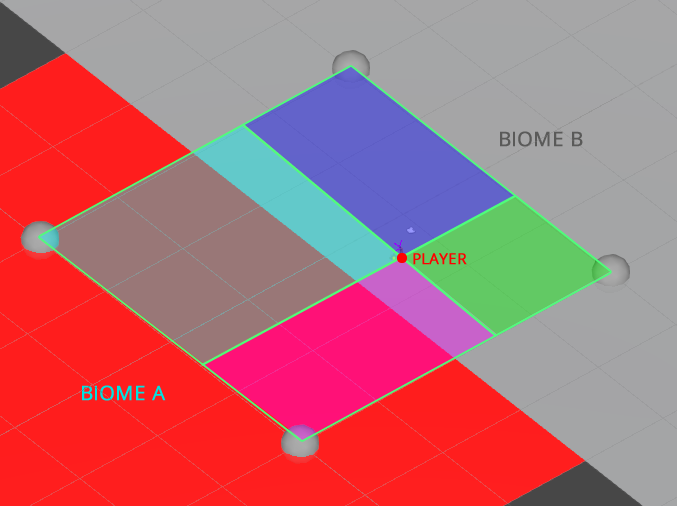
A secondary problem is multi-cell biome interpolation, which is needed for the skybox. This is necessary when you move around between cells, and you want the interpolated states to smoothly blend. So if I’m in cell A, and it’s 50% biome 1 and 50% biome 2, and I move to cell B, which is 50% biome 2 and 50% biome 3, I want the skybox to smoothly transition between the two different states. As I move further out of cell A, biome 1 has to drop down to 0%, and biome 3 has to rise up to 50%, while biome 2 stays level. Luckily this is pretty much a solved problem – it’s called bilinear interpolation, and images do it all the time. We can get the four closest known points, which are the four closest biome cell centers, and figure out how much each one of these cells affect us depending on distance. You can see a rough visualisation of this below.
So, next up is working through all the structural changes Spencer is putting in, and trying to get everything combined into one point which I can then branch off again. Lot’s of things in the works!
MILS
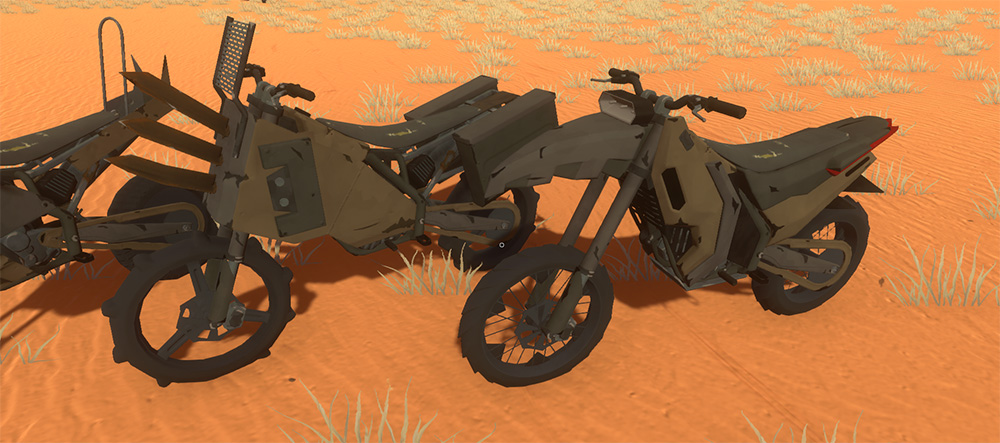
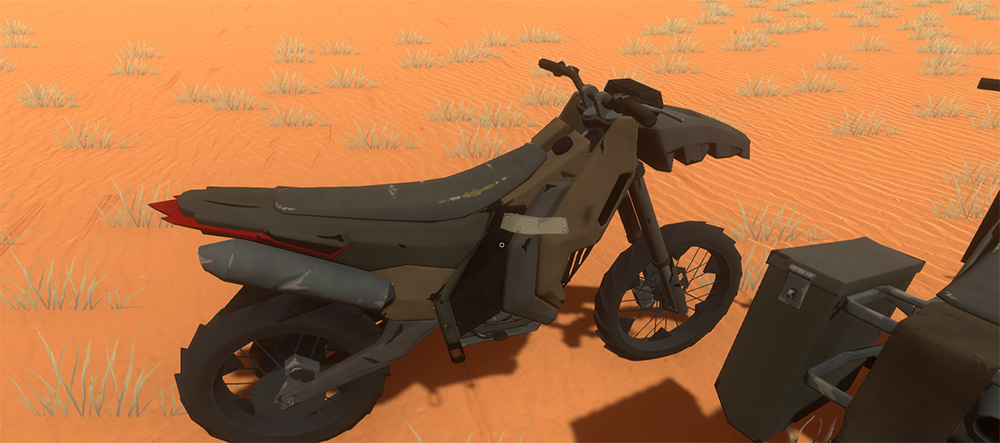
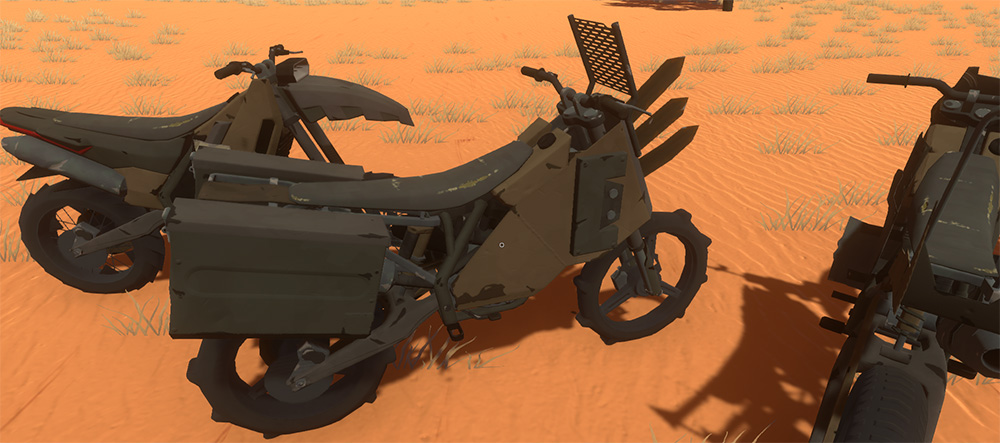
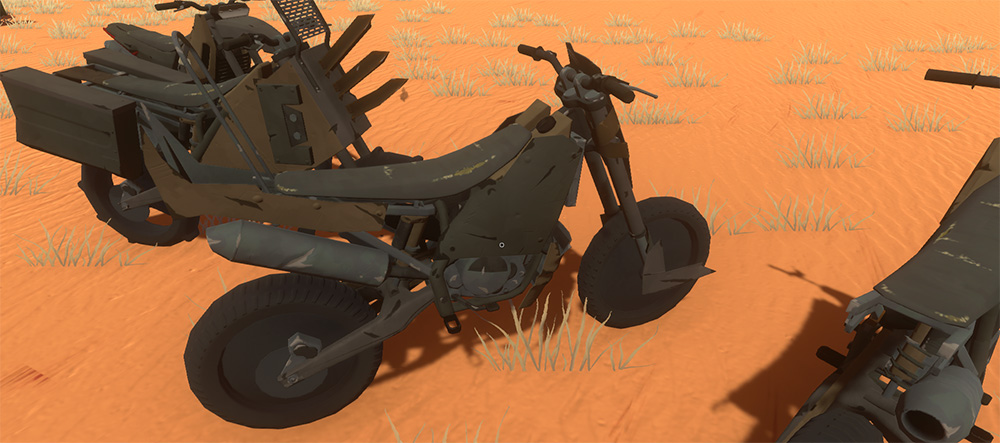
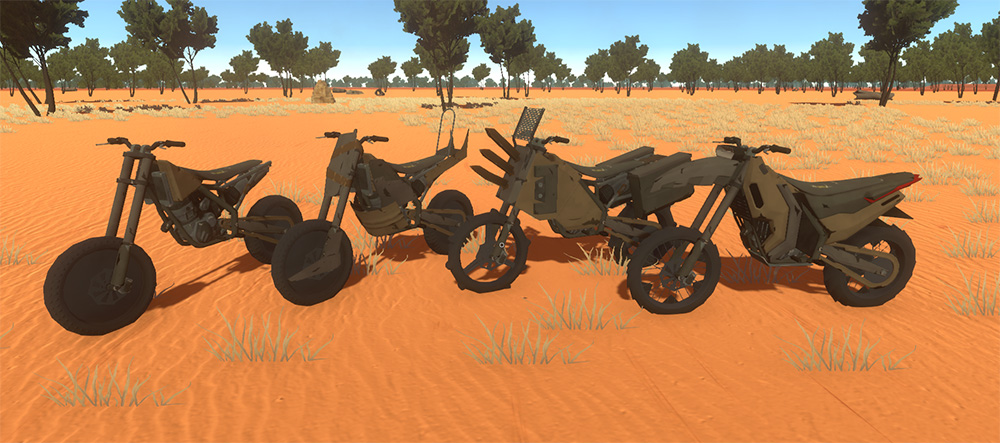
I have allllllmost finished the base texture for the Kanga this week. I have to texture the wheels, which will be fairly quick, then I have to bake the Ambient Occlusion map and generate the Specular/PBR maps from the Albedo map. The time consuming part of the texturing is done though. I will probably spend Monday finishing off the base texture and then dive into making some sweet decal designs for the body areas. These will be yet another set of designs that are completely different from the Roach and the Goat. I have a couple of ideas already which I want to try out, so I can get stuck into it straight away.


TOM
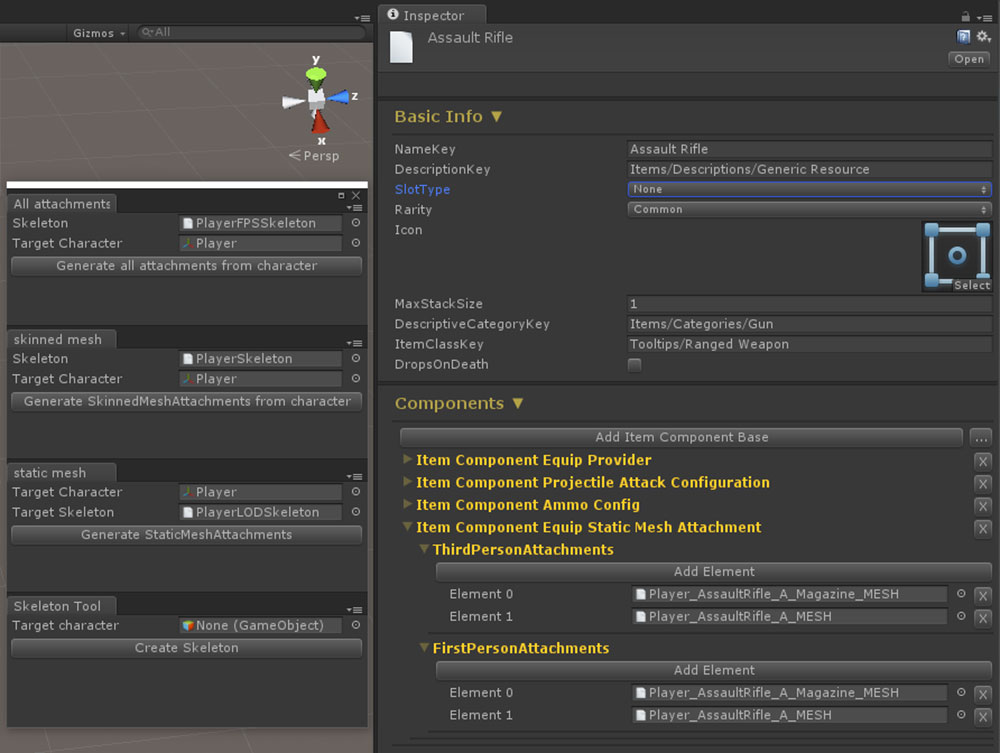
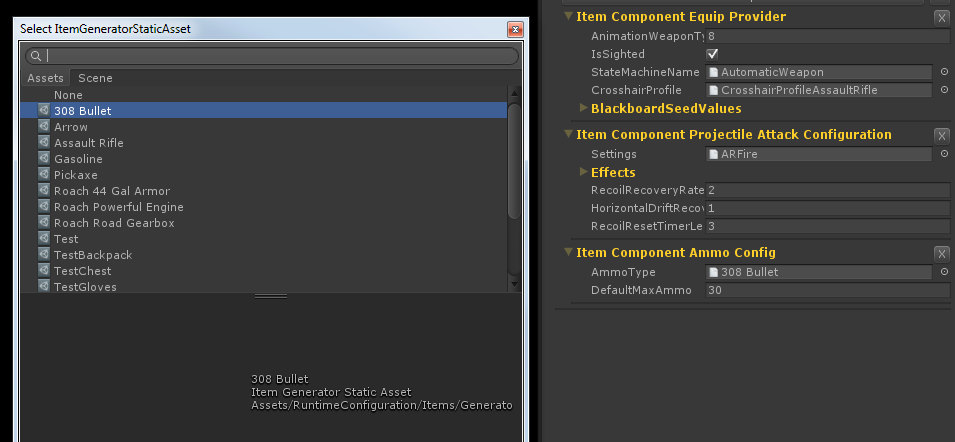
This week I’ve been working on itemv2 again getting the mesh baking system integrated and working for players. I started out rewriting our static mesh attachment class which we are using for the majority of equippable items. My first pass at the class made too many assumptions like limiting attachment points to only 1 attachment and providing no method to bake static attachments together. If we’re going to be able to deliver on interesting randomly rolled loot we need a way to stitch different stocks, barrels, receivers, sights etc together and if we can bake them all together we can reduce draw calls to 1 per item rather than 1 per part (note: in practice many shaders need more than 1 pass and guns generally need to be separated into different animated parts, ie. the magazine needs to be separate from the receiver so they can be separated during reload but even without getting down to 1 call per item there are still savings to be made).
After getting statics working together I worked on an overhaul of the mesh attachment tools, used to convert mesh assets from Unity’s definition into ours. We’ve tried to make the tools as easy to use as possible, for skinned meshes as long as the mesh is bound to the same skeleton it will automatically transform the mesh into character space at the original reference pose meaning you can create assets from any reference pose as long as the skeleton is the same. For static meshes the tool automatically finds the attachment bone by recursively searching up the transform hierarchy from the mesh until it finds a matching reference from the skeleton definition, it then generates a transformation matrix to shift the verts so they are defined relative to the bone, allowing them to be placed directly on the bone, freeing up their current game object.
Both static and skinned meshes are generated by selecting a skeleton and a target character and hitting the generate button, the tool then walks down the hierarchy finding all static/skinned/both meshes and attempts to convert them all at once whilst logging feedback into the console. The workflow we envision is setting up a character within a Unity scene, positioning all the attachments correctly then selecting the root character gameobject and clicking the generate all attachments button. Then the mesh attachment assets generated can be assigned as item components inside the new item system.
Now the mesh baking system is properly integrated into the itemv2 branch, you can see it in action here putting together a few smg configurations together on the fly:
Work on the Kanga is still going and we tested a new build at the end of the week which has given me a new list of changes to address for this coming week. Mils is getting very close to finishing up all the textures so then we just need to sort the final crash animations + testing testing testing.
SPENCER
Nothing exciting this week as I’ve been working on backend and infrastructure stuff. For the first half of the week I’ve been tackling one of the last outstanding items on ItemV2 and integrating it with map creation, mod loading and our general architecture. This system manages the concept of referencing something that you may or may not have in your project.
The reason we need to do some lifting around this area is to make it so content creation in future wont be a nightmare of things pointing to eachother by names, names conflicting, the wrong assets being loaded and items having multiple versions running on the same server (like 2 wood log versions that don’t stack)
The main challenge here is we need to be able to select things in our mods (or default hurtworld packages) that are contained in something else. When a map selects that it wants to spawn a coal rock, it needs to select which networked prefab instance it is referring to. As the map doesn’t include a copy of the coal prefab, it needs to go find the correct one at runtime that may have been loaded as part of the default assets, or by another mod. There may even be a mod that overrides the default coal rock prefab that we want daemons land to spawn without having to change the map.
Another scenario is, someone creates a mod called “Awesome Resources 5.0” which contains all sorts of new metals, rocks and materials, including ways to obtain them. You would like to create a new weapon that is crafted out of Awesome Resources, but don’t actually have their source files to pick from inside Unity.
This is where the new HurtDB comes in, which allows you to pick any mod or default content pack and add its “Asset Manifest” into your project. What this does is extracts a list of all things inside a mod package that should be referncable like Items, construction prefabs, networked entities, vehicles, resource nodes, recipes, creatures etc, and adds a dummy copy of them to your local project.
This allows you to use the native unity editor to select references to objects that you didn’t create (that are backed by a 128 byte guid) that can be resolved once the mod loads in the game client.
This also solves a few nasty issues we have had on our radar around server owners wanting to load mods after a save game has been created, making it so every asset that is ever loaded from a mod, can be properly identified and versioned to ensure savegames never break because a mod created did something dumb.
Git Pain
The second half of the week was wasted punching on with git providers to find a place to put our 50gb of asset files. BitBucket let us get away with our git repo growing to a massive size on one repository, however when I tried to migrate most of the assets to the map sdk repo it cracked the sads saying 1gb was the maximum for a repository. Interesting considering our main repo is 38gb compressed.
After a lot of research, I discovered a new extension to git that game developers have been waiting for forever! Git LFS
Anyone who has developed games using git would know that it just doesn’t handle large binary files very well. The usual alternative is to run all large assets in a different system like Perforce. Since perforce is a horribly bloated piece of crap, we do our best to minimize its usage.
Fortunately in the last year or so, bitbucket and github teamed up to build Git-LFS, a solution to git handling large files well. If you are a dev and haven’t checked this out, do yourself a favor. Instead of storing the files inside git, it stores a SHA hash and deferes to a supported large file storage system. When you fetch from a remote, instead of downloading every version of that 50mb texture your artist has ever committed, you fetch only the revision you checkout into your working copy.
What I needed to do now was go through our entire repo history and remove all storage of large files and replace them with Git lfs links. If you ever need to shirk a git repo, this utility is an absolute life saver: BFG Git Repo Cleaner
BitBucket still doesn’t allow hosted repos larger than 2gb, so I tried to move over to a paid github account. I attempted the upload over the weekend and found that it took so long, the files had expired by the time the last one finished… We needed a better solution.
That’s where BitBucket Server saved the day. I grabbed an old machine, installed a fresh copy of windows, and deployed our own custom installation of BitBucket, all in a few hours. This allows us to continue to use their awesome infrastructure, but hosted on our premises and without size restrictions.
Good to go now, but 3 days wasted. Back to moving all our assets into the default package mod structure this week.
This week my SDK work has extended into reworking the biome, weather and skybox system (it’s really sort of one system, so the reworking encompasses all of it). I also kept fiddling with and making some biomes. Check out this WIP mountainous biome!
This refactor will enable users to specify custom biomes, weather systems and biome-influenced client effects in the SDK, something that was previously impossible.
The first thing that needed doing was rethinking the usability of the biome tools we have in place. While the ShigiTools biome tool was usable, it wasn’t super user friendly. While that will still be an option, we now have a MapMagic output that will work as well, and a biome painting tool in the editor.
Biomes have changed a bit in how they work. They are no longer concrete enumerations that are linked to a script that builds how they work. Now, their configuration is entirely serialized and configurable, everything from the color of the sun to the temperature to if you want it to blast a gazillion units of radiation every day at noon for an hour. A map will now have a ‘base biome’, which acts as a fallback for when there is no mapping for the cell a player is in.
We also upgraded Time of Day, the skybox plugin that we use for skybox rendering. There are some pretty nice features in it, like a cool atmospheric scattering effect, which might make the world look a bit prettier with minimal effort. Also, the latest Time of Day implements natively animated parameters. This means things like if you want the color of the sun to change throughout the day, this is now much more viable. Previously we had to implement this ourselves with this whole layer of abstraction, and now we don’t need to, which makes the whole system way cleaner and better. However, it did lead to an interesting performance issue.
One of the requirements for a skybox is interpolation. A cell can contain an arbitrary amount of biomes at different strengths. You need to interpolate, or tween, between the configurations. This was easy to do in the previous version of Time of Day, because all the configuration was structs or value types so we could do quick lerps without allocation. However, Time of Day implements animated colors via the UnityEngine’s Gradient class, which contains two arrays of the color keys and alpha keys, meaning it’s allocation city. I experimented with pooling these gradients, but it was kind of a rabbit hole. Just getting the alpha and color keys of a UnityEngine.Gradient allocates memory. So I took the interpolation back to the drawing board.
What I really needed, I thought, was the ability to apply a weighted normalized stack of skybox configurations to a weight. A weighted normalized stack in this context is just a mapping of biome to weight, which is a number between one and zero, where all the weights combined add up to 1. While before I was crunching this stack down into a final object – meaning I had to lerp UnityEngine.Gradients, meaning allocation – if I instead just stored the necessary information of the stack and processed it as I went, then I didn’t really need to store the result of the stack anywhere. This works great! We can interpolate between arbitrary amounts of biomes, it’s fast, and we’ve reduced memory allocations to zero.
A secondary problem is multi-cell biome interpolation, which is needed for the skybox. This is necessary when you move around between cells, and you want the interpolated states to smoothly blend. So if I’m in cell A, and it’s 50% biome 1 and 50% biome 2, and I move to cell B, which is 50% biome 2 and 50% biome 3, I want the skybox to smoothly transition between the two different states. As I move further out of cell A, biome 1 has to drop down to 0%, and biome 3 has to rise up to 50%, while biome 2 stays level. Luckily this is pretty much a solved problem – it’s called bilinear interpolation, and images do it all the time. We can get the four closest known points, which are the four closest biome cell centers, and figure out how much each one of these cells affect us depending on distance. You can see a rough visualisation of this below.
So, next up is working through all the structural changes Spencer is putting in, and trying to get everything combined into one point which I can then branch off again. Lot’s of things in the works!
MILS
I have allllllmost finished the base texture for the Kanga this week. I have to texture the wheels, which will be fairly quick, then I have to bake the Ambient Occlusion map and generate the Specular/PBR maps from the Albedo map. The time consuming part of the texturing is done though. I will probably spend Monday finishing off the base texture and then dive into making some sweet decal designs for the body areas. These will be yet another set of designs that are completely different from the Roach and the Goat. I have a couple of ideas already which I want to try out, so I can get stuck into it straight away.
TOM
This week I’ve been working on itemv2 again getting the mesh baking system integrated and working for players. I started out rewriting our static mesh attachment class which we are using for the majority of equippable items. My first pass at the class made too many assumptions like limiting attachment points to only 1 attachment and providing no method to bake static attachments together. If we’re going to be able to deliver on interesting randomly rolled loot we need a way to stitch different stocks, barrels, receivers, sights etc together and if we can bake them all together we can reduce draw calls to 1 per item rather than 1 per part (note: in practice many shaders need more than 1 pass and guns generally need to be separated into different animated parts, ie. the magazine needs to be separate from the receiver so they can be separated during reload but even without getting down to 1 call per item there are still savings to be made).
After getting statics working together I worked on an overhaul of the mesh attachment tools, used to convert mesh assets from Unity’s definition into ours. We’ve tried to make the tools as easy to use as possible, for skinned meshes as long as the mesh is bound to the same skeleton it will automatically transform the mesh into character space at the original reference pose meaning you can create assets from any reference pose as long as the skeleton is the same. For static meshes the tool automatically finds the attachment bone by recursively searching up the transform hierarchy from the mesh until it finds a matching reference from the skeleton definition, it then generates a transformation matrix to shift the verts so they are defined relative to the bone, allowing them to be placed directly on the bone, freeing up their current game object.
Both static and skinned meshes are generated by selecting a skeleton and a target character and hitting the generate button, the tool then walks down the hierarchy finding all static/skinned/both meshes and attempts to convert them all at once whilst logging feedback into the console. The workflow we envision is setting up a character within a Unity scene, positioning all the attachments correctly then selecting the root character gameobject and clicking the generate all attachments button. Then the mesh attachment assets generated can be assigned as item components inside the new item system.
Now the mesh baking system is properly integrated into the itemv2 branch, you can see it in action here putting together a few smg configurations together on the fly:
Work on the Kanga is still going and we tested a new build at the end of the week which has given me a new list of changes to address for this coming week. Mils is getting very close to finishing up all the textures so then we just need to sort the final crash animations + testing testing testing.
SPENCER
Nothing exciting this week as I’ve been working on backend and infrastructure stuff. For the first half of the week I’ve been tackling one of the last outstanding items on ItemV2 and integrating it with map creation, mod loading and our general architecture. This system manages the concept of referencing something that you may or may not have in your project.
The reason we need to do some lifting around this area is to make it so content creation in future wont be a nightmare of things pointing to eachother by names, names conflicting, the wrong assets being loaded and items having multiple versions running on the same server (like 2 wood log versions that don’t stack)
The main challenge here is we need to be able to select things in our mods (or default hurtworld packages) that are contained in something else. When a map selects that it wants to spawn a coal rock, it needs to select which networked prefab instance it is referring to. As the map doesn’t include a copy of the coal prefab, it needs to go find the correct one at runtime that may have been loaded as part of the default assets, or by another mod. There may even be a mod that overrides the default coal rock prefab that we want daemons land to spawn without having to change the map.
Another scenario is, someone creates a mod called “Awesome Resources 5.0” which contains all sorts of new metals, rocks and materials, including ways to obtain them. You would like to create a new weapon that is crafted out of Awesome Resources, but don’t actually have their source files to pick from inside Unity.
This is where the new HurtDB comes in, which allows you to pick any mod or default content pack and add its “Asset Manifest” into your project. What this does is extracts a list of all things inside a mod package that should be referncable like Items, construction prefabs, networked entities, vehicles, resource nodes, recipes, creatures etc, and adds a dummy copy of them to your local project.
This allows you to use the native unity editor to select references to objects that you didn’t create (that are backed by a 128 byte guid) that can be resolved once the mod loads in the game client.
This also solves a few nasty issues we have had on our radar around server owners wanting to load mods after a save game has been created, making it so every asset that is ever loaded from a mod, can be properly identified and versioned to ensure savegames never break because a mod created did something dumb.
Git Pain
The second half of the week was wasted punching on with git providers to find a place to put our 50gb of asset files. BitBucket let us get away with our git repo growing to a massive size on one repository, however when I tried to migrate most of the assets to the map sdk repo it cracked the sads saying 1gb was the maximum for a repository. Interesting considering our main repo is 38gb compressed.
After a lot of research, I discovered a new extension to git that game developers have been waiting for forever! Git LFS
Anyone who has developed games using git would know that it just doesn’t handle large binary files very well. The usual alternative is to run all large assets in a different system like Perforce. Since perforce is a horribly bloated piece of crap, we do our best to minimize its usage.
Fortunately in the last year or so, bitbucket and github teamed up to build Git-LFS, a solution to git handling large files well. If you are a dev and haven’t checked this out, do yourself a favor. Instead of storing the files inside git, it stores a SHA hash and deferes to a supported large file storage system. When you fetch from a remote, instead of downloading every version of that 50mb texture your artist has ever committed, you fetch only the revision you checkout into your working copy.
What I needed to do now was go through our entire repo history and remove all storage of large files and replace them with Git lfs links. If you ever need to shirk a git repo, this utility is an absolute life saver: BFG Git Repo Cleaner
BitBucket still doesn’t allow hosted repos larger than 2gb, so I tried to move over to a paid github account. I attempted the upload over the weekend and found that it took so long, the files had expired by the time the last one finished… We needed a better solution.
That’s where BitBucket Server saved the day. I grabbed an old machine, installed a fresh copy of windows, and deployed our own custom installation of BitBucket, all in a few hours. This allows us to continue to use their awesome infrastructure, but hosted on our premises and without size restrictions.
Good to go now, but 3 days wasted. Back to moving all our assets into the default package mod structure this week.